Sunday 30 March 2014

Advertising a Workshop

Hi everyone

Yesterday I was looking at my You Tube channel and tweaking a few playlists when I realised I do not advertise my workshops hardly at all so I set to creating a playlist and I edit a video I made at Christmas that I decided to give free with my Tangle Card Templates.

Originaly these templates were designed to enable me to introduce Zentangling to my classes.  They turned out to be great fun and, if I say so myself, let even a beginner to Zentangle make fab cards.


This is one of the Christmas designs.  The beauty of the 10 templates is that they come with spare shapes so if you are Zentangling and make a mistake you can just Zentangle another shape and you card is not ruined.  All the pieces are cut out and assembled decoupage style to make up the final card design.

As I was filming the 14 videos that come with the workshop it occurred to me there was so much more to these patterns and I tried stamping with them - they looked fab and then I tried using patterned papers and that was a great success too.


At the time I made videos that explain both methods.  This is a paper pieced version - what a great way to use up those christmas patterned papers.

This year I took it a step further when I made print files that allow you to batch make this card design.  Check out the video to see what I mean.  I am now offering 2 pdf files free with every purchase of this versatile set of templates which can be purchased from my blog or my ETSY shop.


This video shows you how quick and easy it is to make fab looking cards ready to send at Christmas.  The PDF file for the Curvy Tree Design allows you to make 12 cards in one batch.


I am working on the tutorial for the Holly Wreath but it's pdf file allows you to make 20 cards in one batch.  I hope you like the concept and that you purchase a copy of this very versatile template with 10 fun designs - 5 Christmas and 5 Birthday versions.  They look fab which ever technique you decide to use to make them up.

There are more possibilities for batch making cards with this template - Zentangle one whole sheet and then photo copy it before you make it up!!!

All this for only £8 - what a bargain!!!!  Have I tempted you yet?! ;-)  Check out the video to see all the other card designs.  Here is the link for the full playlist for some of the workshops I sell - I have a few more adverts to make!!!!

I am off to pack up for a crop with my friends today - I hope you are having a lovely Sunday and thank you for popping by X

Friday 28 March 2014

Beach Hut Mixed Media Canvas

Hi Everyone

I wanted to start this post with a great big thank you for all your support and kind words and good wishes on my Graphic 45 Audition.  Unfortunately I did not make it.  I am not disheartened as I had great fun and every cloud has a silver lining and I now have a further set of Workshops to share with you all!!!!!  Good Luck to all the finalists as they submit their videos for stage two!

Today's video project really got me in the mood for some Summer Sun.  I love the beach and this project features something you see there - well you do here in the UK.  Beach Huts - love them.  I share a couple of other beach hut inspired art during the video too.  I don't know what it is about them - they are cute - they come in fun colours and they totally make you think of lazy days by the sea having fun with the family.

Anne and Mo you both guessed completely right from the sneak peek yesterday as you can see!


I really enjoyed making this - Distress Paint and Graphic 45 papers and lots and lots of glue!  I actually used my new Tim Holtz layering stencils and turned wooden bird shapes into seagulls with a quick lick of paint!


Don't those hitch fasteners make the cutest door knobs?!  I think I will definitely make more canvases in the future as I really enjoyed working on this one - here is the how I did it video.  Hope you enjoy watching and that it inspires you to make a canvas for your home.


Wishing us all some sunshine as we head into the weekend.  Thank you for popping by X

Thursday 27 March 2014

Graphic 45 Design Team 2014 Audition

Welcome to my Graphic 45 Design Team 2014 Audition.

I have loved Graphic 45 papers ever since I bought my first sheet which was 'Bees Knees' it was full of red cherries and polka dots (I still have one piece of it left!).   I love the versatility of the gorgeous mini prints as much as I love the intricate vintage images we all love to fussy cut.  I hope my post showcases my love of designing and that Graphic 45 paper collections fire my imagination.  I am so excited about taking this opportunity again (audition post from last year) to audition once again for the wonderful Graphic 45 Design Team.

I am passionate about designing projects and then teaching others how to make them.  So it is natural for me to run classes and workshops and to share lots of tutorials on my You Tube Channel as well as creating online workshops for larger projects.  I am addicted to creating videos and work hard to make my tutorials and workshops professional and easy to follow.

I have taken this opportunity to create some new projects for this audition and I found it difficult to choose which other projects to include in my audition post as I know I am going to be competing with lots of very talented people out there in Graphic 45 land!  Fingers and toes crossed and here we go……..

Secret Garden Canvas - Lots of fussy cutting with a touch of silver gilding.


This started life as a Scrapbook Layout way back in May last year but I was so pleased with how my flower vines turned out it would have been a shame to squash them in an album so I turned it into a pretty canvas.


Tropical Travelogue Carriage Clock - I loved creating the display of tropical flowers and foliage for this brand new piece.  This project was built from chipboard - This is my favourite kind of designing, from chipboard and paper to carriage clock - I have so many ideas for different versions of this design - I might now have the perfect excuse to get my hands on the By The Sea Collection!!!! ;-)


A close up of all the fussy cutting.


Steampunk Spells Spooky Halloween Mini - A great reminder of Halloweens past and a cute album that can be made with any Graphic 45 paper collection as it uses the cut apart Journalling Card Pages as tags for journalling and more photographs.


This was a little tricky to photograph to capture all the detail so click here to watch the video I filmed to look through this spooky mini.  I am currently editing the tutorial for this.

Ladies Diary - Box of Memories - I wanted try to create faux vintage treasures that may have been left to me by my Great Great Grandmother.


I had lots of fun thinking what might be in my box of treasure.  A valentine given to my Great Grandmother, my Grandma's locket and trinket box, a bobbin of lace and a Christmas pomander from my Great Great Grandmother.


Ladies Diary had all the delicate prints and images I needed to create this set of pretty trinkets.

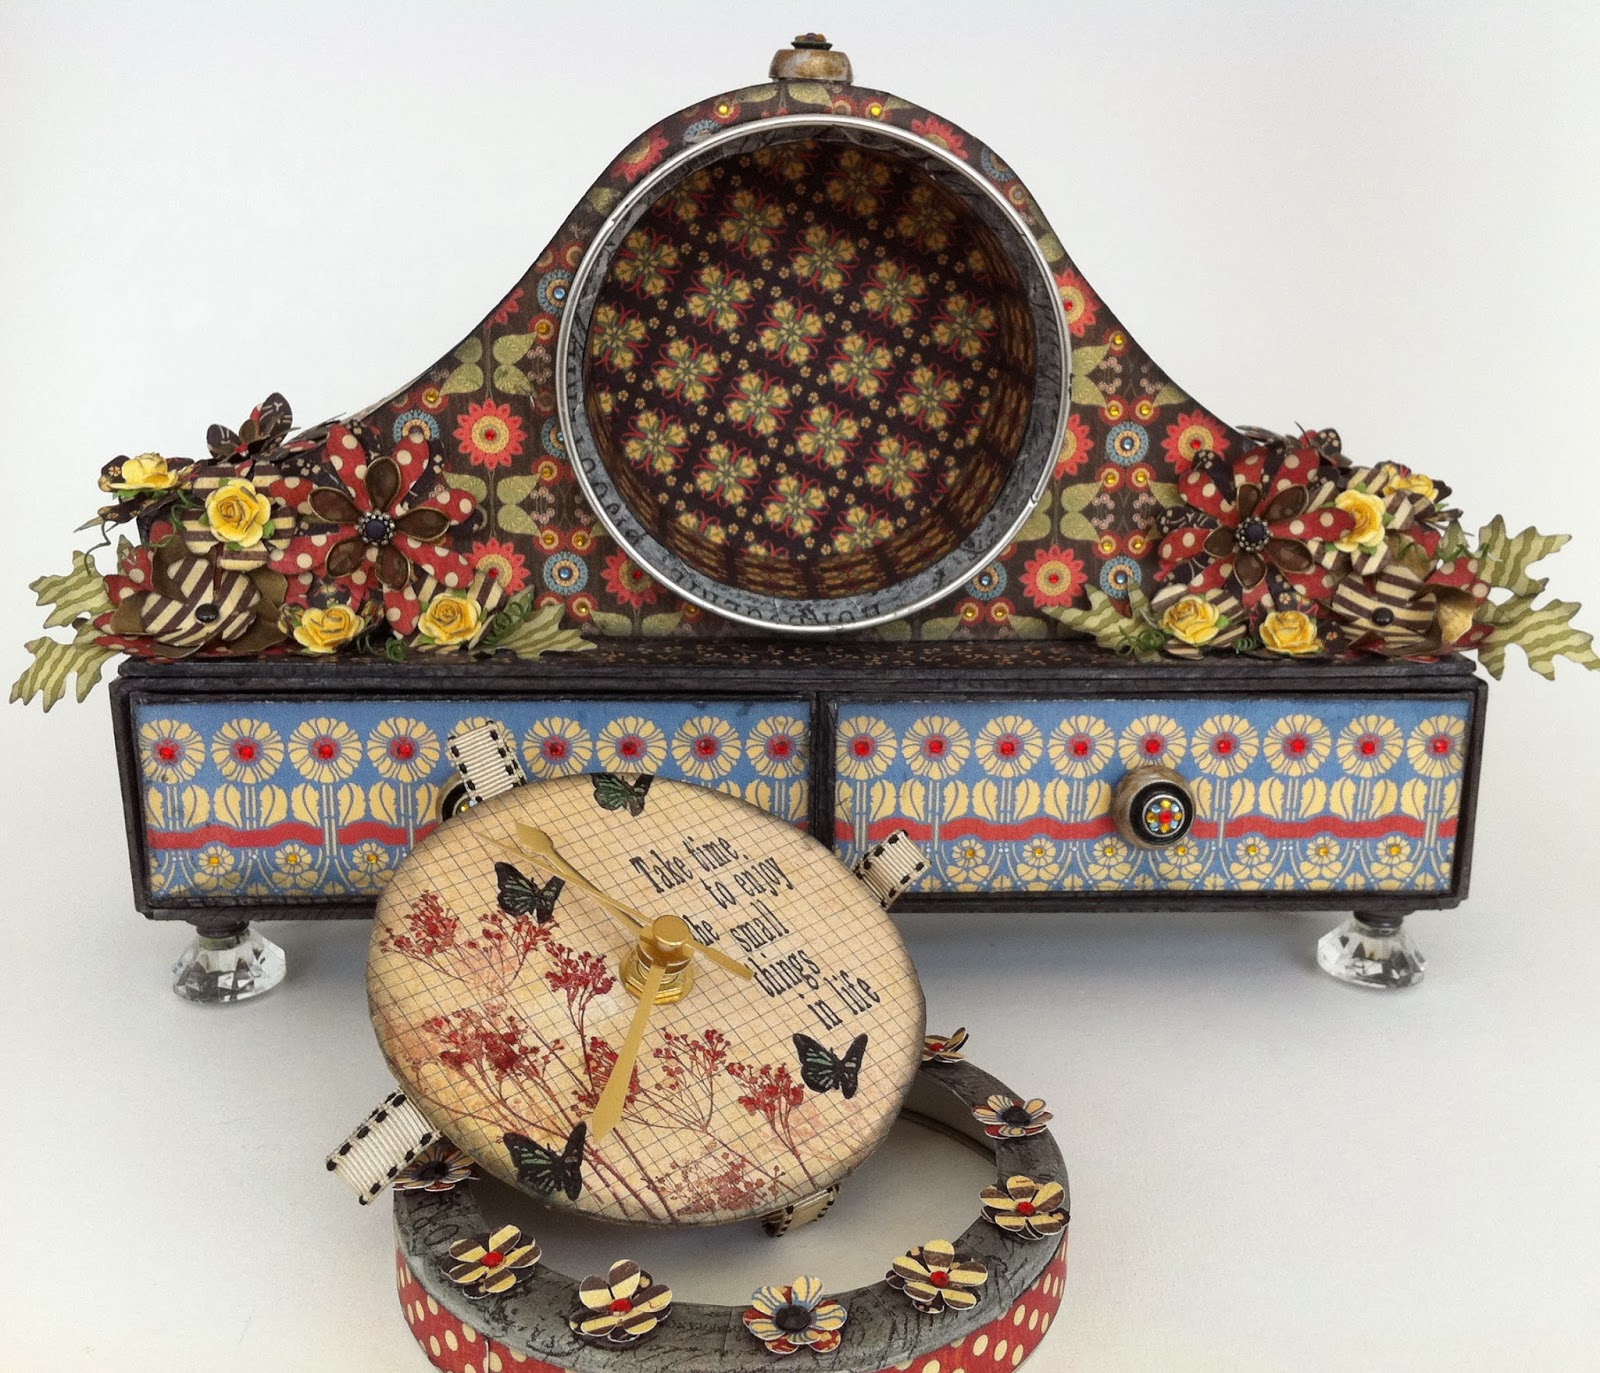
Graphic 45 Mantel Clock - I loved combining Graphic 45 prints for this project.


Drawers for Tags or in my case jewellery as this clock sits on my dresser.


There is even room for a Mini Album behind the clock mechanism or it could be somewhere to store secret treasures!


Pyramid Mini for a Boy or a Girl - One project two very different looks courtesy of two very different Graphic 45 paper collections.


What treasures can you put inside?  This one was originally designed for my son Callum's 14th birthday but I have since taught it in workshops.


Complete with a Mini Album for all those party photos.


This one was just for me as I love the Ladies Diary paper collection.


When I design a large project like this I try to make it as versatile as possible to appeal to as many crafters as possible.

French Country Memory Box and Mini - Made with an altered Matchbook Box.


This is a mini and memory box combined and is a design that could be made for lots of occasions.


I am using it to record happy family memories associated with recipes.  I used the Journaling cards as tags so that I can write down those recipes as well as journal about the memories that are associated with them.


Underneath the mini is a memory box with lots of compartments to store treasures - this would make a great project to record a special holiday too (mmmm By the Sea!!!).


I made a video tour of this project last year so here is the link.  This is another project that is difficult to photograph effectively!

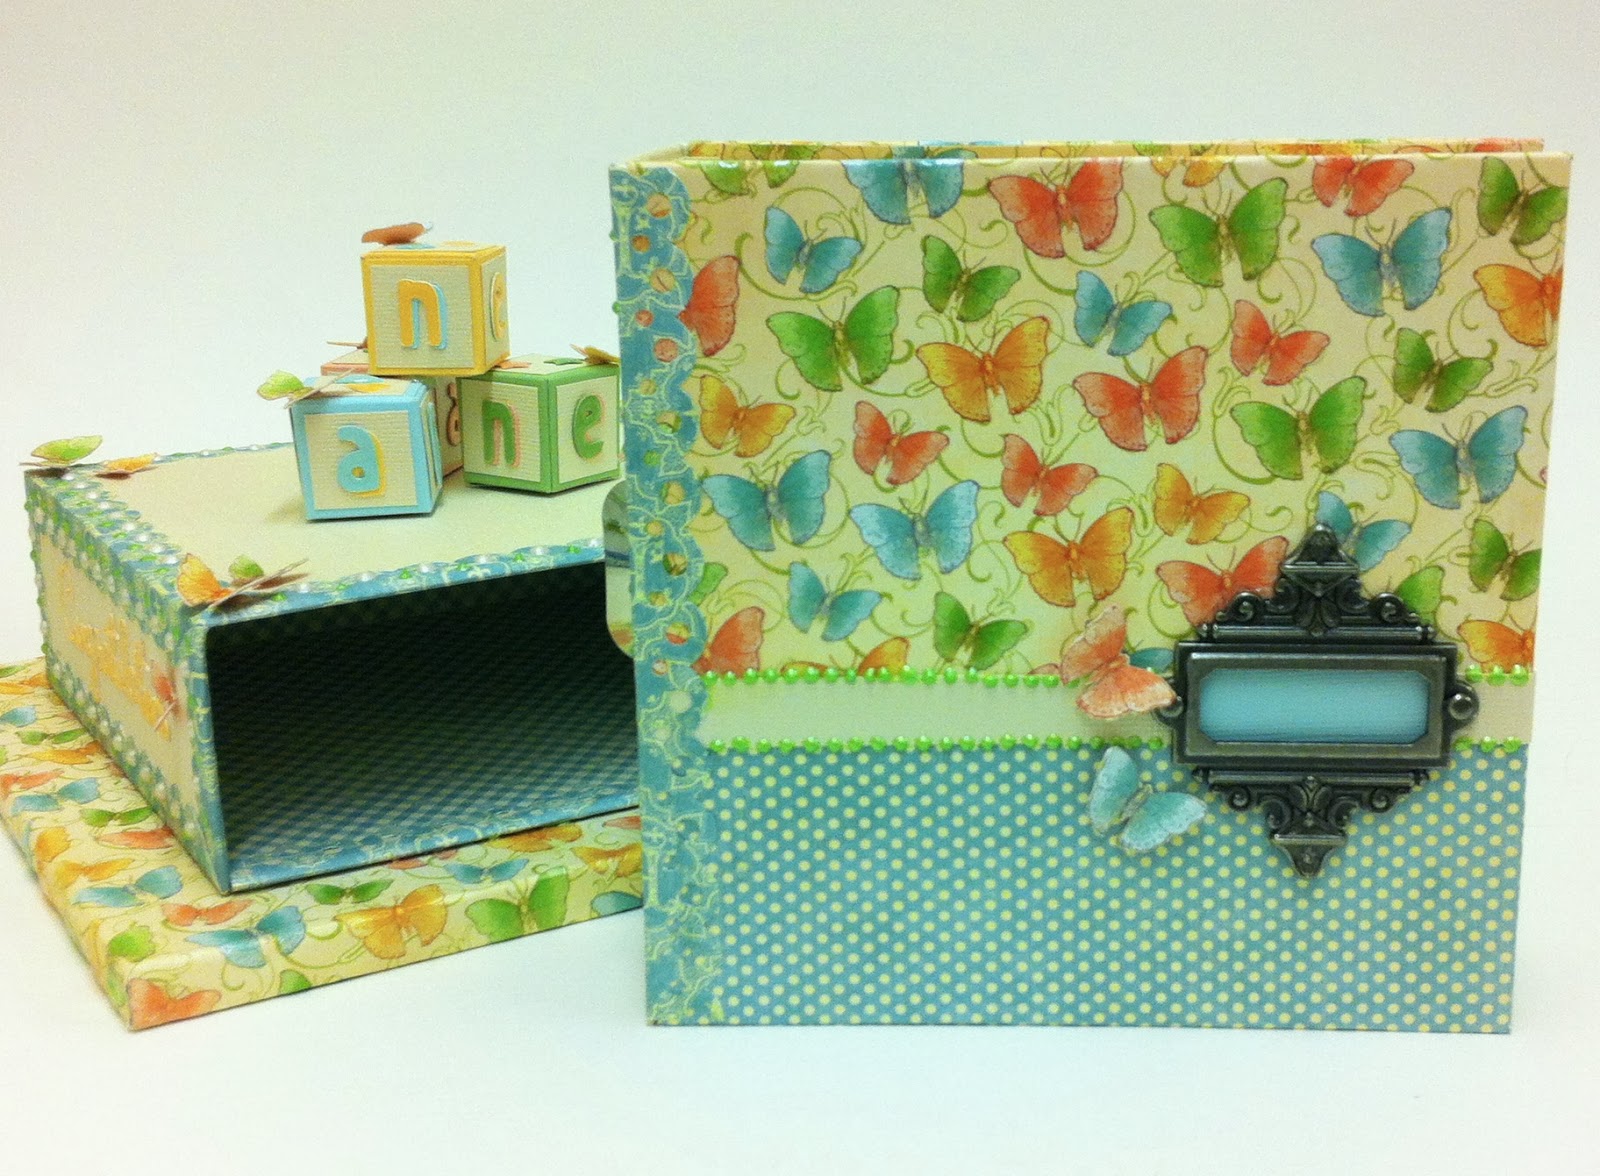
Little Darlings New Baby Cake and Mini Album - I loved making the little stack of cute baby blocks for the cake topper.


As I wrote all the journaling prompts for the Mini Album it bought back happy memories of filling in baby albums of my own.


The online workshop for this is almost complete and there is a Christmas and Birthday cake version as well as a three-tier wedding cake…... (no pressure on my two handsome sons though!!! ;-)

A Few Scrapbook Pages

Scrapbooking and cards was where my passion for paper crafting began.  During my crafting journey I have made many lovely and very talented crafting friends, both in the real world and more recently in the online world, over the years and I am so grateful for their support and kind hearts.

Mother Goose Layout - Gorgeous bright patterns - perfect for the fun fair photograph - a master class on how to make your supplies go a long way!

Olde Curiosity Shoppe meets Magic of Oz


What to do with such pretty leftovers?


I have a tutorial on how to make companion 'Project Life' style pages on my You Tube Channel.

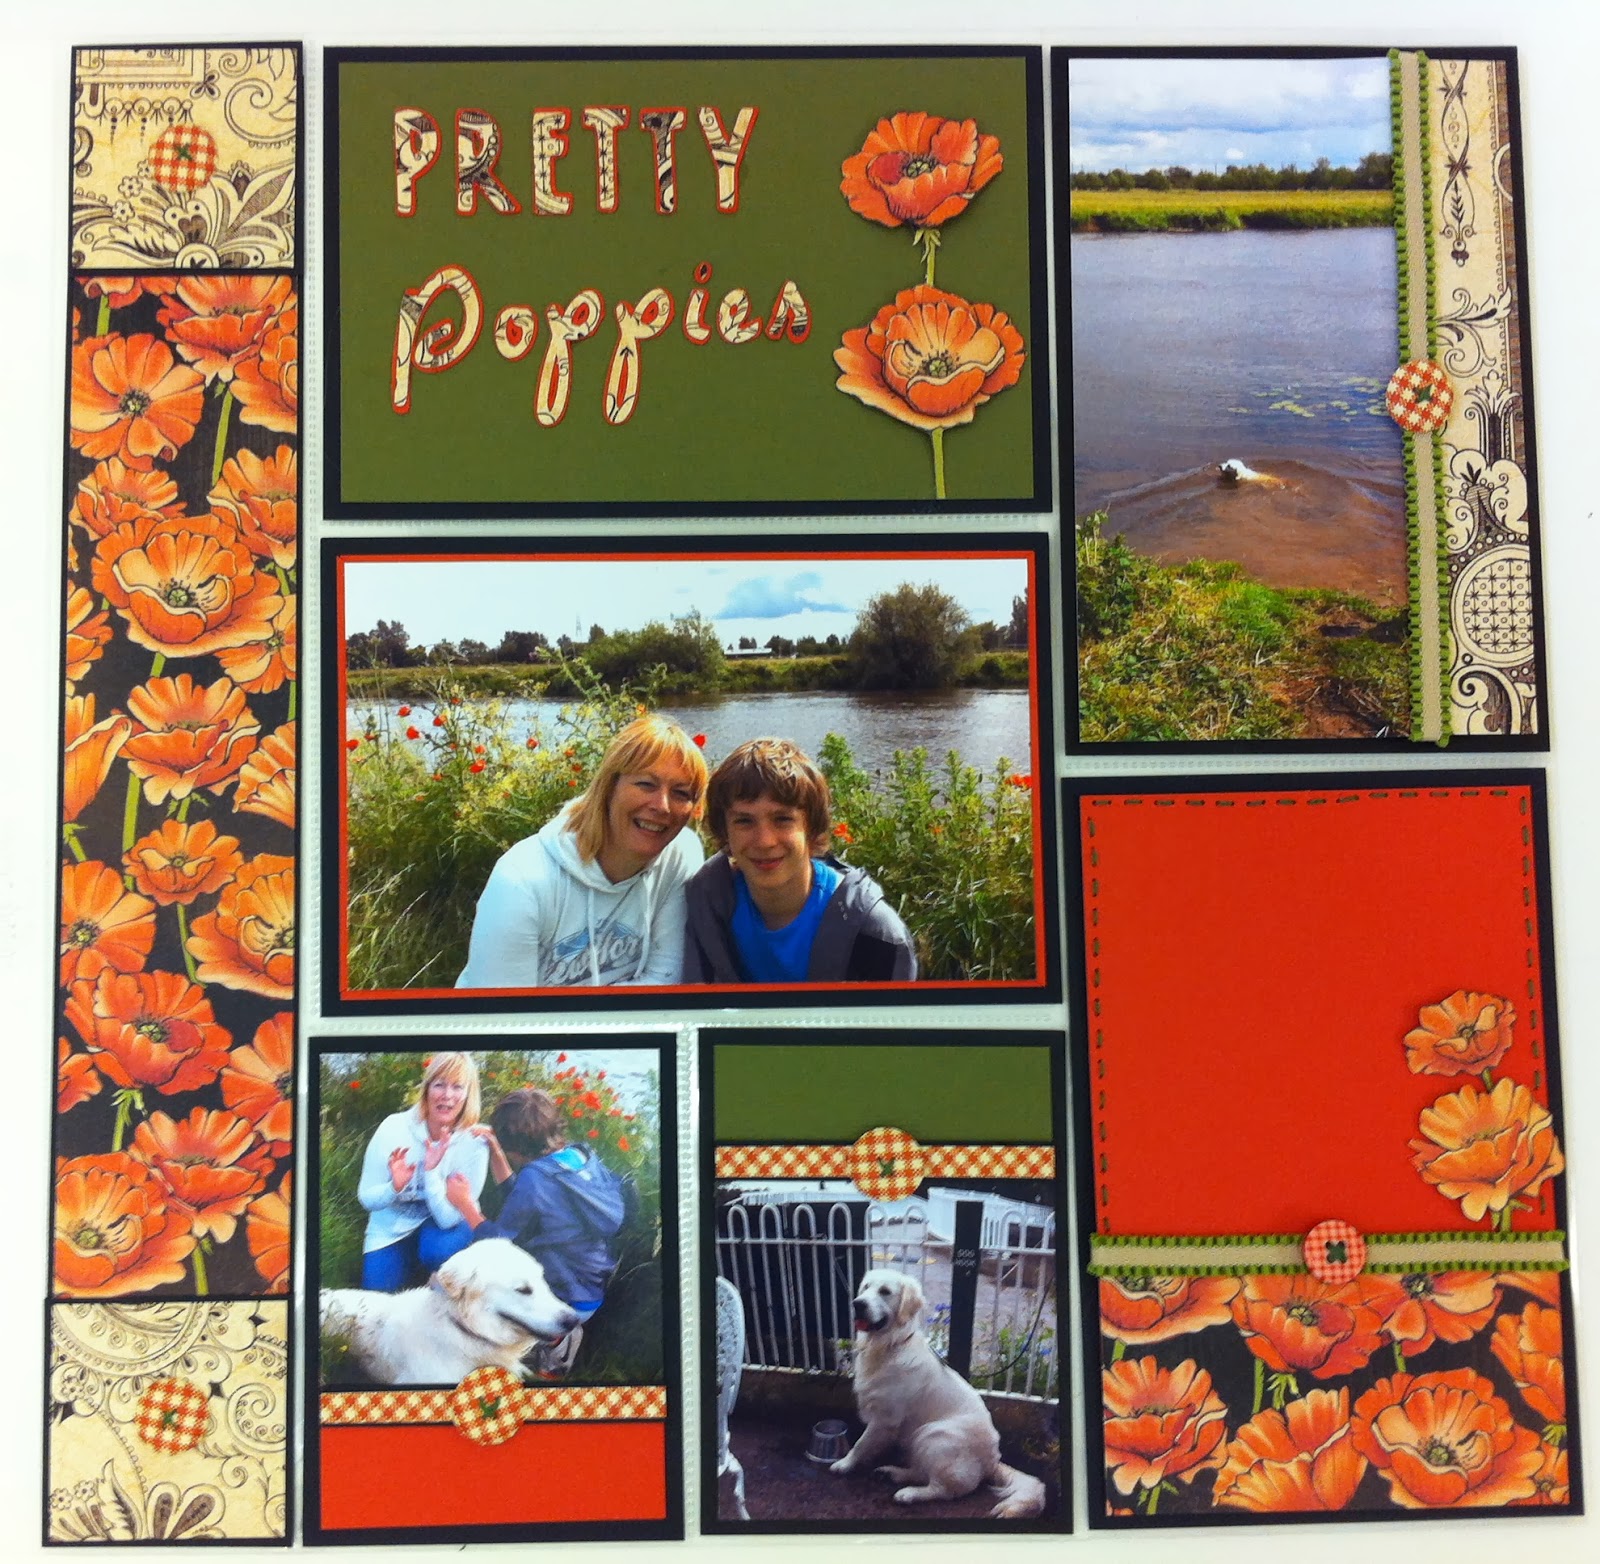
Tropical Travelogue Layout - I love using Graphic 45 images as embellishments on a page.

There is so much detail on every page to inspire your creativity - I was really pleased with how the fish embellishments and fussy cut frame turned out.


A Couple of Cards


Secret Garden Double Slider Card


Steampunk Spells - An alternative Valentine!


I think I should create an envelope with a health warning - 'Open with care!!!' (tutorial awaiting editing)


Sometimes Layouts Inspire Cards - A great way to use up pretty paper scraps.


I made a tutorial for this double easel card.

I love mixing and matching gorgeous Graphic 45 paper lines this time Little Darlings with ABC Primer for a baby to grown up layout that inspired a fun Birthday card for my lovely hubby who has been a real star supporting me this week.


Phew!  As you can see Graphic 45 fires my imagination and I thank you for that and I really hope you like my projects.  I love to design and I love to make tutorials so that others can make them too.  I hope this post and the links capture that passion.  Thank you so much to Graphic 45 for this exciting opportunity and thank you to my blog friends for your support and for giving me the confidence to give it a go!

As always thank you for popping by X

Sneak Peek and a Layout.

Hi Everyone

I am busy editing a mixed media canvas video but I thought I would take a break and share a sneak peek of it with you.


I think if nothing else you can guess the theme of this canvas!  I had great fun making it and I am looking forward to sharing how I did it with you.

I also took a break to finish off a layout - one of two that I worked on at the last crop I went to.  As usual it needed a title and some journalling so here it is.


Graphic 45 Bird Song is the perfect collection for these photos of China Town in Epcot.  Callum is pleased as punch to be posing with his choice of souvenir!


I think at first glance this layout looks fairly simple but take a closer look!  I fussy cut the birds and butterflies on the border strips top and bottom of the page to add interest as well as layering up the lanterns to add dimension.  I hope Callum remembers to point these out when he shows them to his grand children……..mmmmm……I think I had better point them out to him first ;-)

Hope you are all having a lovely day and I will be back tomorrow with that video (You Tube willing!)

Thank you for popping by X

Monday 24 March 2014

12 Tags of 2014 - March

Three months into the year already.  Can you believe it?  The weather here has been very changeable in March and before I post my tag for Tim Holtz's 12 Tags of 2014 I wanted to share a photo I took yesterday.


You can imagine the downpour!  How cool is that?  You can see how bright the sunshine is against the white walls of the houses and how black the rain clouds are - and not one but two beautiful rainbows.  Definitely worth the rain!!!

This months tag technique was smudge stamping and let me tell you before you watch the video I made a few mistakes!!!!  I couldn't seem to do right for doing wrong!!!  First I didn't have the lovely stamps Tim used so I struggled choosing suitable ones from my collection and it took me a few goes until I got a composition I liked.  The technique involved making a second generation stamped image and I kept forgetting and automatically reinked my stamp on several occasions……..then I didn't read Tim's tutorial correctly and I thought he only smudged the second generation images……wrong and then I made a mistake and smudged the first generation of stamping and got cross as I had to redo the tag and when I edited the video I realised that I didn't need to redo the tag I should have just carried on smudging!!!!!!  What a palaver!  It did make me chuckle though so I didn't cut it all out of the video so I hope it makes you chuckle too!!!

I got there in the end as you can see…..


I think I got there in the end!!!!  I really enjoyed turning my tags into luggage labels using Kraft Glassine to make faux leather.  Instead of putting strips of tissue tape to adorn my tags the way Tim did I decided to make rosettes with the tissue tape and my new Custom Fasteners made the perfect flower centres as you can see……..


I really hope you like the tutorial and that your weather brings you rainbows as spectacular at the ones we had yesterday.  Don't forget to pop over to see what all the other tag artists got up to this month over at 12 Tags of 2014.  After you have watched the video of course!!! ;-)


Have a great week and thank you for popping by X

Wednesday 19 March 2014

WOYWW 250

Hello fellow desk hoppers!

Yippee some free time to catch up with everyone in WOYWW land!  I have my coffee brewing and my eye on the last cookie in the packet so I am all set to desk hop and visit you all!  Just need to write this post first…….mmmmmmm…..what shall I share today?  Well there is this……


One desk with video tutorial underway.  I love that Graphic 45 harlequin print!  A bit messy but I think it will get a whole lot messier before the tutorial is finished!  My camera is on my desk because I am uploading from the card to my computer at the moment.  Then there is this little lot!


This is my photo desk being used as storage at the moment as it is full of all my Graphic 45 creations…..That is what I have been doing for the past two weeks.  I have been as happy as a pig in mud up to my ears in my lovely Graphic 45 stash…..and that is not all of it …….take a look up here!


 A bit gloomy because of the light outside but I think you can see how busy I have been.  Time to put my feet up and visit with my WOYWW friends!  If you want to see any of the projects in more detail here is the link to the audition post.  I know I am up against some very talented opposition but I have had huge fun trying and have created a little new G45 stash room - I have my eye on that 'On the Beach' collection as I love the seaside.

If you are new around here and don't know what WOYWW is then please pop along to Julia's blog by following this link and hop to the desks of crafty folk around the world.  You will have hours of fun and inspiration and will make lots of new friends for sure.

Happy WOYWW to you and thank you for popping by X

One in a Minion card Tutorial with Free Template

Good Morning everyone

Just popping in to share this brand new You Tube tutorial and I think you are going to like it.  It is a fun card for a boy, a girl and Minion lovers everywhere!

Here is the boy version………


Card Cutting Guide for Boy Version:

Yellow Card 8" x 8" scored and folded at 4"
Blue Card front and inner (cut 2) 3 1/4" x 7 1/4"
White Card Front 7" x 3"

Exactly the same template with slightly different papers and…..voila…..we have a girl Minion!


Cutting Guide for Girl Minion Card:

Yellow Card 8" x 8" scored and folded at 4"
Black Card front and inner (cut 2) 3 1/4" x 7 1/4"
Flower Paper front and inner (Cut 2) 3 1/8" x 7 1/8"
Black Card front 2 1/2" x 6 1/2"
White Card Front 2 3/8" x 6 3/8"
Greeting inner trim down to 2 1/4" x 6 1/6"

Email me for the free template which also has the inner and greeting print outs so you can make one or two of these for yourself and your family and friends.

I should point out that you should not make these cards to sell as I am pretty sure there will be copyright laws broken if you do!!!!!!!!

Here's the link to the tutorial……


Hope you like it.  I am off to join in with WOYWW next as I have a bit of free time to enjoy visiting with my crafting friends.

Whilst you are here I would love you to take a look at my Graphic 45 Audition post please click on the link and wish me luck!!!

See you again soon and thank you for popping by X

Tuesday 11 March 2014

Scrapbooking 'Project Life' Style!

Good Morning!  I hope you have all had a lovely weekend with time to craft of course!!  I am sharing another video tutorial today.

I love to make what I call Feature Scrapbook layouts.  You know the ones that take ages and normally only have one photograph on so you have lots of scope to get busy embellishing and layering up pretty papers.  When I made this layout I wanted to balance a photograph with two gorgeous papers from Graphic 45.


It was all about creating balance.  The Magic of Oz Poppy Field paper was a perfect choice as our photos were taken by the poppies on the river bank and the Olde Curiosity Shoppe Mercurial Masterpiece had the perfect frame.  Both of these papers were very busy and therefore I decided to go with one feature photograph - Comet has definitely joined in as you can see, I am sure he is smiling!!!  ;-)  I did create room for one other photo and some journalling which if you lift the main photo up is hidden underneath (you will see what I mean on the video).  This layout was great fun to create with all the layering, stitching and fussy cutting but what about the other photos we took on the day?  I wanted to share an ideas video with you for those times when you face the same dilemma.


I used up my scraps from the original layout and made this page in the 'Project Life' style which is so popular with busy scrapbookers at the moment and now I have the best of both worlds in my scrapbook!  Room for more photos and more journalling (eventually!)  It was great fun creating all the little journalling cards and was definitely quicker to put together than the main layout.

If you want to learn more then please check out my video ideas tutorial below.  I really hope you find it useful.  I will definitely be making more companion layouts in the future.  Just looking at this photo the journalling card bottom right would make a nice design for a card don't you think?!


Wishing you all a fun week.  I will be sharing something exciting shortly.  I am on the final stages and it is all a bit manic but I am having a ball!

See you soon and Thank you for popping by X
Related Posts Plugin for WordPress, Blogger...