This blog is a record of my creative journey. I love to share my passion for paper crafting so I design projects and then create tutorials and workshops to show you how to make them. Please feel free to wander around to check out all the things I share both here, in my ETSY shop and over on my You Tube channel. Thank you for popping by!
I am a bit behind with the challenge again. Apologies for posting 3 tags in one week. I really can't believe it is the final week of the Alphabet next week. Where is the time going this year?
Here is my W tag. When I looked up the patterns associated with this letter there were 2 plus the colour of the tag 'Sea Glass' and that took me down the Water theme appropriate for W too!
The watery pattern is called WAVES, the seaweed is WIST and the fishes scales are WARPED EGGS. I added a touch of watery shine with my glossy accents.
My X tag fell on the lovely bright blue colour SALTY OCEAN and as you can imagine there were only a few patterns beginning with the letter X. It was the colour that made me decide to turn my patterns into tiles as the colour reminded me of Moroccan tiles. More glossy accents to get that tile effect. The patterns I proacticed are X (simple to write but not to draw!) and XENSO.
....and last but not least is my Y tag which is covered by one pattern, Y-FULL. I enjoyed drawing this one. When I flick through all my tags I find that I am drawn to the patterns that have a woven look an almost 3D quality to them. This fab pattern was designed by the lovely Shoshi a blogging friend who is a skilled Zentangler. This pattern was the first one she designed. I am not sure I am quite up to designing a pattern myself yet but I will keep practicing!
I though as we are nearing the end of our Alphabet challenge that I would make a video as I caught up with my tags so if you want to see how I work then please take a look.
When I was watching this video through I kept seeing glimpses of my sleeve and it almost appears I am wearing a Zentangle patterned blouse!
I am looking forward to seeing everyones collections of tags when we finish our Tag Tuesday Alphabet Challenge next week and I hope to have a home for mine to show you too....though the way time is behaving at the moment I am not promising!!!!
Hope you are having a fun week and that the sun is shining on you - I have my fleecy on again!
Good morning on a cold grey day here in Derbyshire. Who is hogging all the sun again that is what I want to know!? I have my fleecy on and my fluffy socks. I have been working on my tags for Tim Holtz 12 Tags of 2013 and here is June's. I was a little 'Distressed' when I saw Tim's tag this month as I don't have any Distress Markers...........poor little old stash deprived me...... tee hee! I know you are all feeling sorry for me right now ;-) But isn't that just what makes this challenge fun. If you haven't got it then improvise and that is what makes a tag your own. I used my Ripe Persimmon and Shaded Lilac Distress paints to do my colouring in with a touch of Shabby Shutters. The colours remind me of squished berries and that is great for a tag celebrating the month of June.
If you are following me you will know I am making videos of how I get from Tim's inspiration to my interpretation so here is the video for my June tag.
I am still playing catch up with my tags so I am also posting my March tag today.....Yes contrary to the pictures it is definitely my March tag! I don't know what happened but when I labelled it up I went with May.....ooops. I have changed it now so the photos and the videos say May but it is definitely March ;-)
So my didn't have items were the lovely dies Tim used in March and that cute tinsel. I put on my thinking cap and decided that Tim's cute bunny reminded me of a shaker tag and that is where I began.
My solution to not having the paper Tim used to cover his tag was to try out a paint transfer technique with some gorgeous images from the Graphics Fairy and I decided to see if it could be done using the New Distress Paints and I am happy to say it did! I only have 4 Distress Paint colours so far but each time I use them I am impressed by their versatility so I am definitely going to add to my collection.
If you want to know how I made this tag then please watch my video as once again I start at Tim's inspiration and end up with my interpretation.........I think I like that phrase!!!
Ha ha.....I didn't realise that You Tube had selected this frame as the thumbnail of my video! Coffee and crafting.....all that is missing is the cake and cookies!
I think I might just go and put the kettle on! Thank you for popping by X
PS Don't forget to check out my giveaway for anyone that is kind enough to follow me already or who wants to join me on my crafting adventures. Just a small token of my huge appreciation of your support.
I am posting this in the moonlight as the clock tick tocks into the early hours of Sunday! I have been waiting for hours for a tutorial I made for this layout to upload!
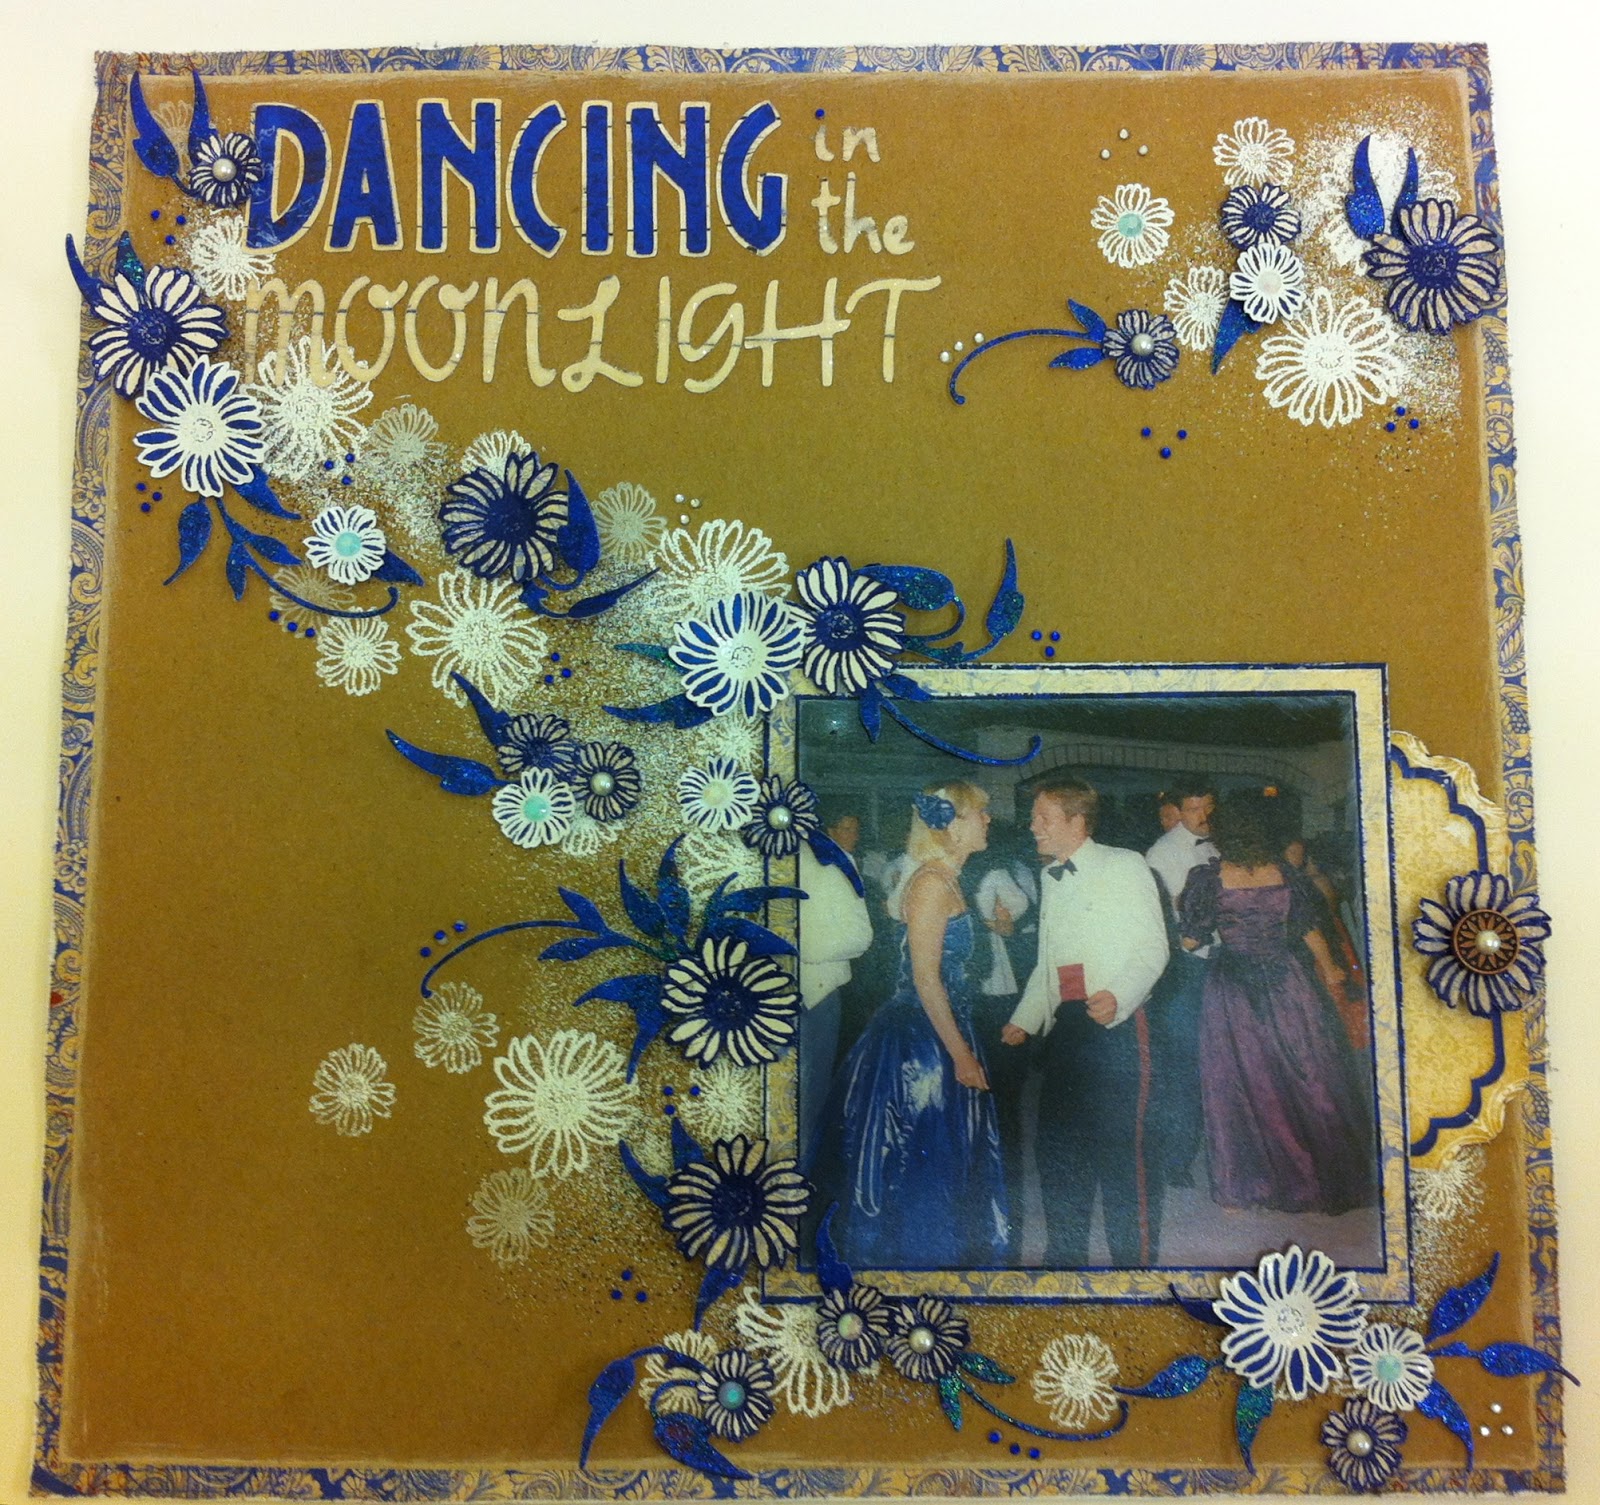
I made this layout to take part in the Simon Says Stamp and Show Challenge and this weeks theme is anything Kraft. As I looked through all lovely Design Team projects it was Anita's creative layout that caught my eye and really made me think that I don't tend to do anything inky on my layouts other than the odd inked edge or two! So here is where her inspiration led me!
I really liked creating the misty effect by sprinkling on embossing powders - free styling! You have to be careful not to blow them all over your craft room but it adds great texture and is the perfect background for my Daisy Trail!
How perfectly does that Bo Bunny blue match my dress!!! I designed it and made it myself many moons ago (1990 ish!) I even made fabric flowers for my hair slide - if only I knew then what I know now!!!! I could have started my own company.........;-)
Looking at this photograph I remember that my hubby always used to moan on those hot summer's evenings (in Cyprus) that the ladies had the best deal because we could wear sleeveless dresses and sandals when the men all had to wear full mess kit. I pointed out that his shoes were at least flat so he didn't suffer with sore feet from too much dancing the night away - mind you those long dresses did cover up the fact that many of us kicked off our glamourous heels half way through the ball!!!
As you can see I have yet to journal on my tag so I think I may add this little memory of the nights we could dance until dawn and not need a week to recover!!
If you would like to see how to make this layout then please watch my video tutorial. If you like my tutorials and want to know when I next upload don't forget to subscribe to my You Tube channel.
I think I should go to bed now before the sun comes up! I have almost finished editing my Tim Holtz 12 Tags of 2013 June tag video and I have a catch up one for March too which I hope to post tomorrow - You Tube willing!
Have a fab rest of the weekend and thank you for popping by X
I am sharing a link to Tammy's blog that I found today whilst doing my WOYWW hopping! I was paying a return visit and I espied on the 'You Might Also Like' links a post entitled '5 Journalling Strategies for when you don't Feel like Writing'. Call it fate. If you read my previous WOYWW post you will know I was stuck, as I often am, on my journalling on a layout.
Good Morning everyone.......or afternoon, or evening or whenever it is you happen to be hopping by! I haven't WOYWW'ed for a while and I am looking forward to a good old nosey around to see what you all have been up to ;-)
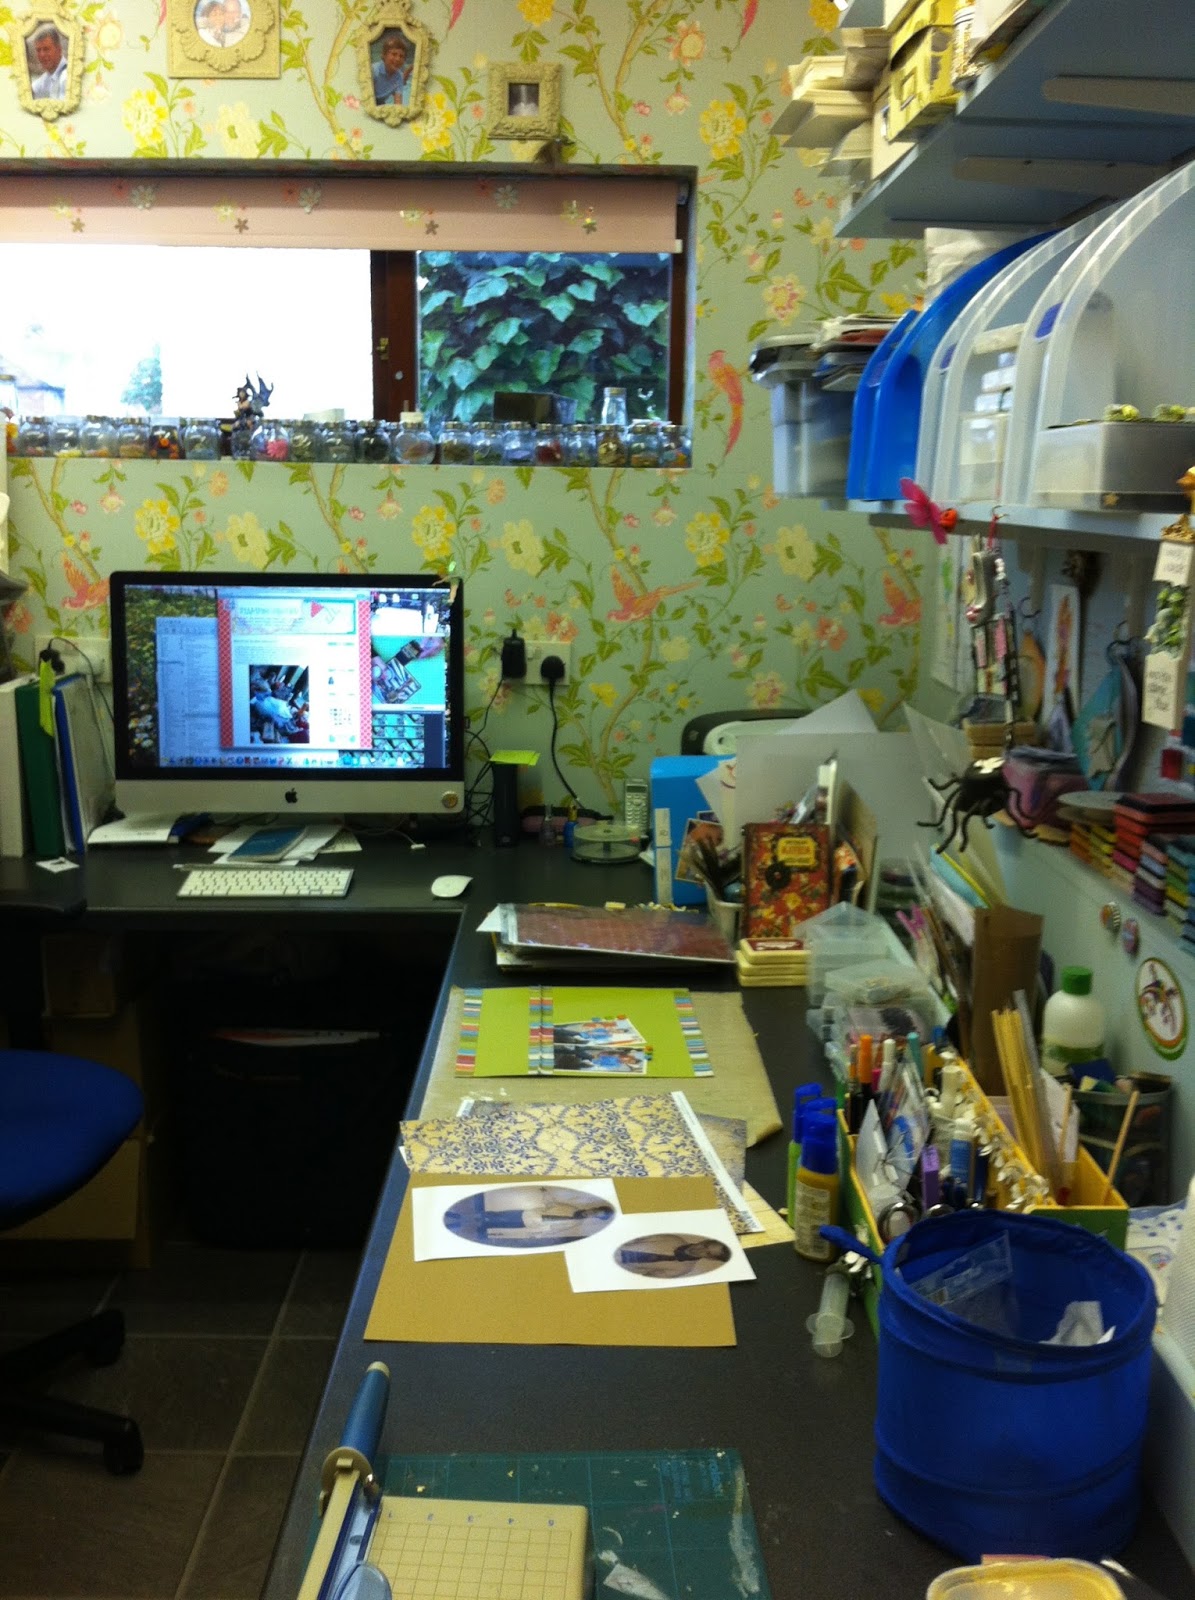
Here is the long shot of my desk today. Lots of to do's on my list. The first one I am doing at the moment - posting to WOYWW which will be interrupted by making a packed lunch for my son if I don't type quicker! In the background of my computer screen you might be able to make out iMovie where I have a project open that I want to finish editing today.
Help needed! I have had this layout on my desk for a couple of days waiting for inspiration to strike!....and waiting and waiting. I wanted to think of something witty and short .....any suggestions?
I am also going to make a layout using Kraft paper as that is the Challenge this week over at Simon Says Stamp and Show. Look at those gorgeous Bo Bunny Anthem papers!
Short interlude - Callum packed off to school and Comet's breakfast sorted though he did look at me with expectant eyes when he saw Callum's ham sandwich! If only he could talk ;-)
Just to let you know if you follow me or want to follow me (and I would love it if you did) I am having a thank you giveaway of an online class. There is a sticky post which you may have already passed on the way in. Just comment on the sticky post if you already follow me or comment if you decide to follow me today - easy peasy! Here is the link.
So without further ado I am going to post this over at Julia's place and then I am going to hop, hop, hop! Follow this link if you want to know more about WOYWW. There all will become clear and you will see I have not completely lost the plot and you will meet lots of lovely crafty folk with interesting and beautiful things on their desks.
Thank you for popping by X
PS. Just a quick update follow this link to see where my blog hopping took me today and what I learnt there.
I can't believe that it has been over a week since I last posted! I have been busy crafting but it wasn't something I could share just yet!!!
Here is something I can. This afternoon I have scrapbooked some old family photos of my husband on his Christening day. I used some of my papers from the Bo Bunny Gabrielle collection. They are perfect for that pretty vintage look that goes so well with old sepia coloured photographs.
I used half of the Gabrielle Mocha Die cut to make a flap ......mmm should something that looks so pretty be called a flap???? I wanted to be able to add the story of the Christening so I needed room and as you can see here I now have plenty and I had room to add a couple more photos. One is of Ivan on the shoulders of his Dad in Hong Kong and one is of Ivan's Mum looking radiant carrying Ivan's brother Mark. I just love looking at the fashions in these old photos. The proud parents look so dapper but apparently they were wearing borrowed clothes as a suitcase had gone missing and that is the story I am going to journal about.
Looking at this picture here I am thinking that the Promenade paper I used to back the die cut is a little dark and overpowering compared to the muted tones of the rest of the layout so I may just tone it down a little with some cream paint before I journal on it. I had fun weaving paper strips through a lacy punched border on my main page which is Gabrielle Stripe.....well it is on the other side anyway!! I just love the colours of this collection and the lovely butterflies that pop up here and there. So as usual this layout goes into the 'still to be journaled pile!' This time though I do have the excuse I am going to get the story of Ivan's Christening from my Mother in Law so it will have to wait a little while until she visits us. Well that's my excuse ;-)
I had a wander in the garden just before I came in to post this and I couldn't resist taking these photos.
Look at this fabulous Peony. It is almost like two flowers in one. I am going to challenge myself to make one of these in paper so watch this space!!
This one is about to open. All the fluffy centre is still hidden from view. I love Peonies but it isn't very often that they stay upright as they normally get battered by wind and rain! That soon makes these huge blooms droop on their stems.
We've got quite a few buds as you can see and the weather is fine (touch wood) so we may get our best display yet!
Oh and look who is coming to say hello! It is the chief maker of patches in the lawn! Doesn't he know he is a boy dog????? Actually the lawn looks good in this photo but you can see one patch middle right. Do you think Comet wants to play? He prefers tug of war to fetch.....I don't think he realises he is a Retriever either!!!!! I think he knows he is cute though ;-)
Six hours and 48 minutes left in the Simon Says Stamp and Show Challenge this week! I don't know where the time has gone???? I seem to be saying that a lot lately. Did someone fast forward time? ;-)
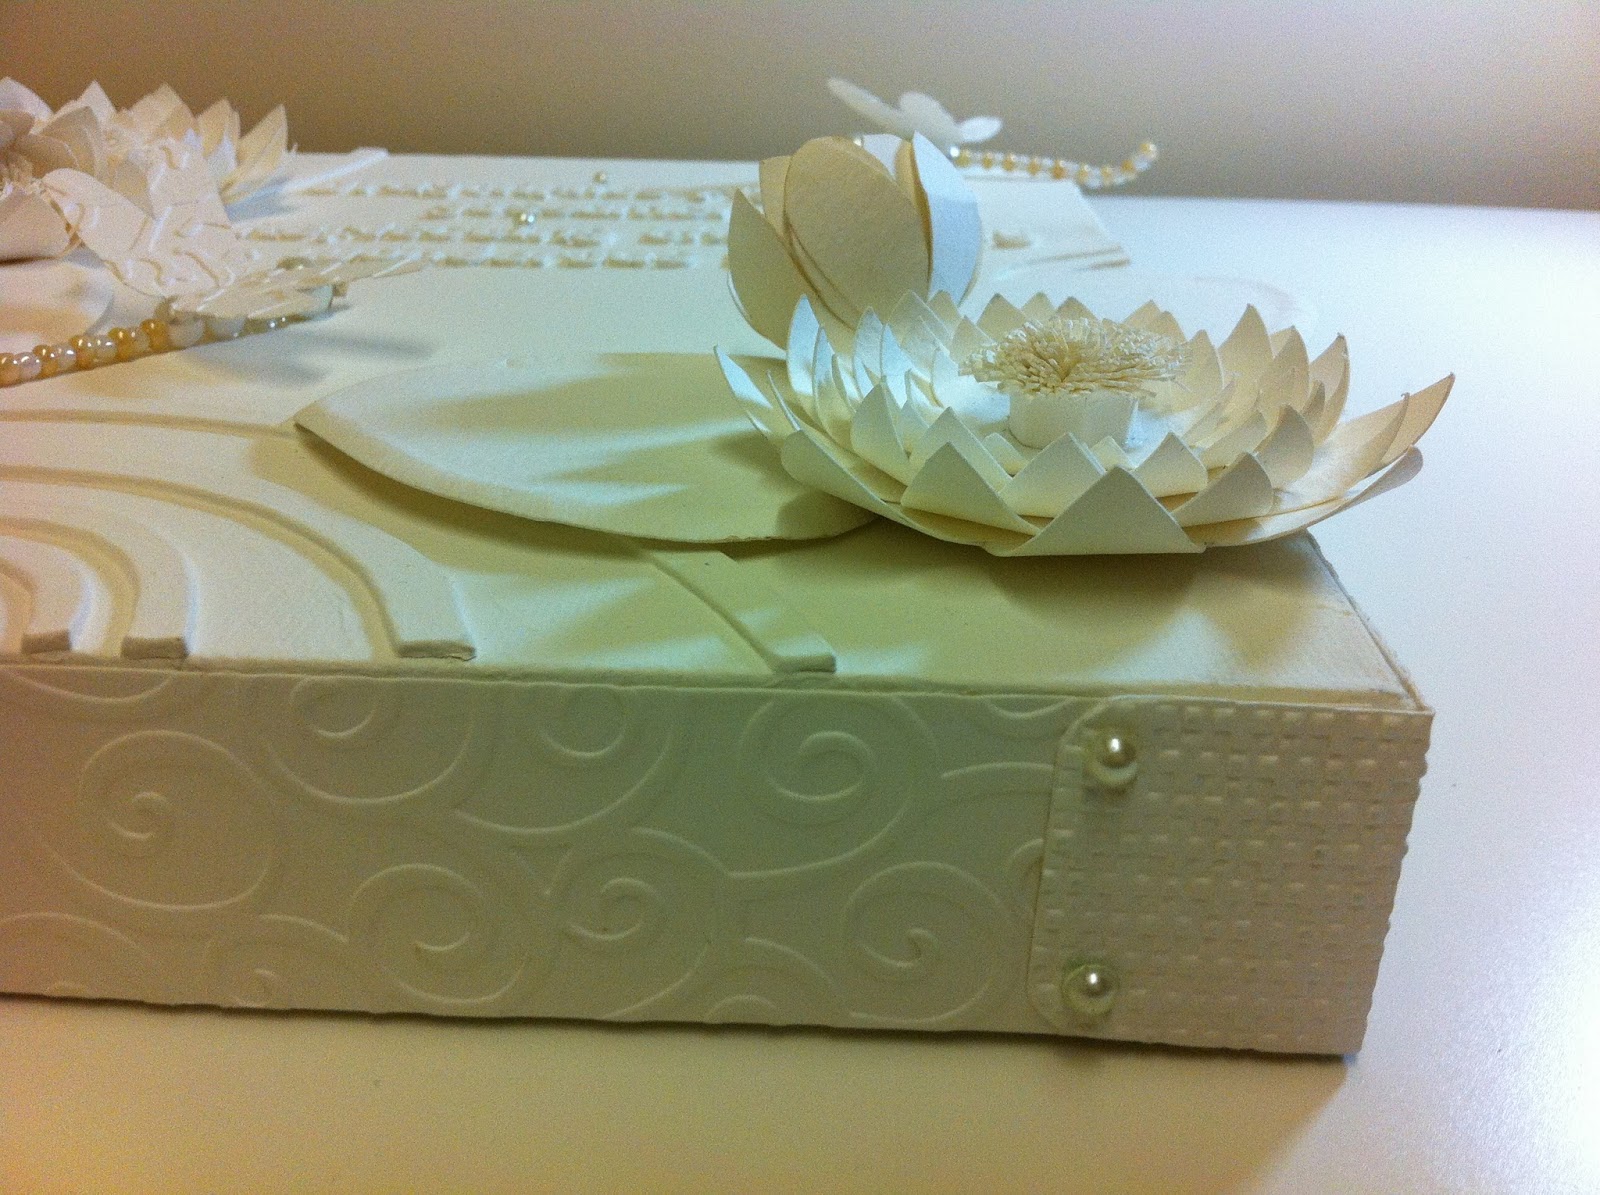
The first 'S' word that inspired me this week was Shadows and as I have made a canvas entirely out of cream card stock and cram paint it is the Shadows that play an important role in how the finished piece looks. It made me think of all the elements we all include in our work that add texture and layers and even if we are not fully aware of it it is the shadows that we create that add the interest and drama to our creations. Working entirely in one colour lets you see all the shadows and I think they definitely add the drama to my Water Lilly Pond.
The other 'S' word was Scissors and they were the most used tool as I put together my canvas I used them to cut out my Waterlilies and Leaves and believe it or not all the lettering. I would rather not have had to cut out the letters but I did not have a chipboard alphabet small enough to use so I hand cut all the letters for my verse. It took me quite a while as you can imagine and there were a few points when I thought.....'What am I doing?!' But I got there and I am quite pleased that as they are hand cut they have the same charm as using your own handwriting does on a layout........However, I will be keeping my eye open for a very small chipboard alphabet all the same ;-)
As you can see my Scissors certainly got a work out. Each of the Water Lilies have 7 Layers and a finely fringed centre.....and as I mentioned before those hand-cut letters.
Look at all that fringing. It takes a while but I really love the fluffy finish it gives to the Lily centre.
I wrapped my box canvas with embossed strips and corners (more shadows!) and added a few creamy pearls to look like brads.
I also used pearls to make the bodies of the Dancing Dragonflies.
Dragonflies flying on gossamer wings.
Reflecting the beauty of wonderous things.
Helen Allen
So with 6 hours and 22 minutes to spare I am pressing the post button and am off to link with the Simon Says Stamp and Show challenge. I wonder what challenge tomorrow will bring!
It's official, I am definitely addicted to making video tutorials. They take ages but it is such a fun way to share inspiration and techniques. I thought you might be interested to know how I produce my videos so for this video I am posting today it started with an idea which I thought it would make a fun tutorial.
I switch on my camera that is perched on a tripod above my desk and make my idea into a layout. A layout normally take me ages even when I am not videoing and when I am I tape everything even the thinking things through and the changing of my mind and the disappearing next door to fetch stash and tools! I do this mainly to avoid forgetting to turn the camera back on if I take a break to find something. Can you guess that I have done that before ;-)
This means I fill up my camera memory card, and it has ha big capacity, normally right before the finishing touches of a project so I have to down load it to my computer before I can finish off. If you ever see lighting changes on one of my tutorials this is probably why. It takes an hour or two to down load and then I get back to videoing the finishing touches of my layout (probably the next day).
Another shorter download and then it takes me hours of editing to get together best bits - talking to myself for hours to explain what I am doing. I am a bit of a stickler for trying to make my tutorials as clear as I can so sometimes it is a few takes before I get the right shots with the right voiceover. I also don't want to bore you by showing you me repeating a process over and over so there are the fast forwards to work out. In my head these are the points you are most likely to pause the video whilst you get to the same point.
Then when I think I am happy I watch the whole thing through and add things like music or written notes to give extra information I think might be useful.
Then I watch it through again and you would think that is it job done - Nope......then I 'finalise' the video which takes hours (I have no idea what the computer is doing but I have to do it before I can upload to You Tube - usually an overnight job and then in the morning all going smoothly I can post to my blog and here it is!!!
That is what I go through when it is a smooth run which this layout was not! The layout itself came together perfectly but then when I edited it I had a 20 minute video. Now anyone that watches You Tube videos knows that shouldn't be a problem......ha..... I have ticked the box that says I want to upload videos longer than 15 minutes but will it let me......oh no! So I spent best part of a day looking for answers and all I learnt is that I am not the only one with the problem. In the end I admitted defeat and reedited the video taking care to get rid of chat and not instruction! And you've guessed it Finalise again and finally upload over last night.
You can imagine I am always happy to turn on my computer the next morning to see the message from You Tube saying my video has uploaded successfully! So for a 15 minute video there is approximately 3 days of work involved. You may then be wondering why I like it so much. It is all about the sharing. I love to design and I love to teach and inspire (I hope) other crafters. Once my video is uploaded it is there for any crafter wherever they are in the world to watch and I hope to craft along or be inspired to create something that pops into their heads. How cool is that?
A lot of reading to do on this post but I thought it might be interesting - If it was not I'm sure you have skipped to the pictures anyway ;-)
So the idea that popped into my head was how to create a faux zipper and if you watch the video you can find out how I used Ranger foil tape sheets and a soda can ring pull to make this fun and zingy layout!
How cute does that zipper pull look?!!! This is a fun layout for fun photos and these photos of Callum and Hubby trying on hats in Disney were perfect to tuck into the open zip!
The zingy papers are from the Fern and Forest Collection by Little Yellow Bicycle. They are a new company to me and I have to say I was impressed by the quality of the paper as I gave it a work out with all that hand sewing! I have got my eye on a couple of new collections coming out....oh no not more shopping!!!
There is another benefit to creating a layout on camera and that is that it doesn't end up in the UnFinished Objects pile! Usually in my case waiting for journalling which as you can see here is all done and now the layout is waiting to go into an album!.....and that is another pile altogether ;-)
Hope you like the tutorial and I'd love you to subscribe to my You Tube channel if you like my work as it is a great motivation to me. I love to read your comments and I try to reply as often as I can and I definitely will reply if you have any questions.
I missed last weeks Tag Tuesday so I have two tags this week - I think the sunshine slowed me down ;-) Hasn't it been nice to enjoy a bit of sun at last?
Here is my tag for the letter U:
This one took a while to get it to the point I liked it. There were only 3 tangle patterns for the letter U and I only liked one of them this one is called UNYUN. I tried some foiling on the pattern which didn't come out as neat as I would have liked so I had to trace over the pattern with a black pen once more. Then it still didn't look right with the foiling against the white background so I added some colour with the Broken China Distress ink and it still wasn't right so out with the Stickles and VOILA!!! Finally I like it. I even had trouble with the ribbon bow and couldn't get that to sit right so a couple of knots and a snip with the scissors and I liked the ribbon too! Projects are like that sometimes don't you think? I keep trying though and there aren't many times I have had to give up and resign it to the bin.
My V tag for this week's letter was the complete opposite and it came together quickly and I was pleased with the design right away. I did have more patterns to chose from though. The table is VERSA, the Vase is VECHE 1 and the flower greenery is the pretty VERDIGOGH. As usual all the patterns I have been practicing are from Tangle Patterns if you want to try some out for yourself.
I have two weeks worth of tags to see so I am looking forward to catching up with everyones creations. I can't believe there are only 4 weeks left of the alphabet. Click on this link if you want to see more tags inspired by the letter V.
Good Morning, Good Morning. I'm happy to report a sunny day and blue skies here in Derbyshire today! Yipee finally some sunshine. It is not hot yet but find a sheltered spot to sit a while and it is very lovely indeed. Gardening is finally being done (mostly by hubby!) though I do have a water feature with my name on it! Just when my nails are looking their best too.
Popping in this morning to share another tutorial with you. Actually it is half tutorial and half fast forward guide! This layout is completely different to yesterdays and I wanted to show you how I made a dimensional frame for my layout. I have chosen to go the whimsical route which makes it the perfect layout for fun children's photos. I also think you could use the same technique to create a pin board or blackboard layout....see what you think.
This layout was inspired by a recent purchase of some Fern and Forest papers by Little Yellow Bicycle. This the first time I have worked with these papers and I like them a lot. The quality is fab. When I shaped the paper frame I had no problems with cracking and even though I built support into the frame it held it shape well. In fact the support was really only there because I don't want it to crush when it goes into a page protector....and from the pile of layouts I have that may be a while away yet!!!
I have been thinking a bit about what my style is and I think I am a bit of a design gypsy. I love the process of designing and I want to start out with the inspiration. For this layout it was the fab woodgrain paper and then to see where I end up and this time it was to create this whimsical layout. As you can see I had loads of fun doodling and then doodling some more! That photo of Callum peeking through a hollow in a tree was perfect for this look. It is all about the journey for me and all the inky papery fun I have along the way and if the destination looks fab then I am a happy bunny indeed!!
I really liked the cute bugs on this layout especially these love bugs! How cute and so easy. I am definitely a hap hazard scrapbooker and I just rifle through my photos both digital and prints until something grabs me and then I go for it. These photos were taken in 2008 when Callum was 9 and now he is 14 and taller than me! Here is the video link:
Well I'm off to have my breakfast and then I have another layout video to finish editing and card packs to finish off for my lessons at the end of the week. I am looking forward to catching up with the girls and to having our usual weekend of chatting and laughing and coffee with biscuits oh and maybe a bit of crafting occurs too!
Wishing you a gorgeous sunny day and thank you for popping by X
I am posting this with hardly any time to spare! I am blaming You Tube ;-) Why oh why does it take so long to upload videos? I wish I were clever enough to patent a solution to this one!!!! Just think of all the craft stuff I could treat myself too!!!!!!
This week challenge over at Simon Says Stamp and Show set me thinking of the many photos of wonderful walks in the woods my family has enjoyed over the years so I knew it was the perfect excuse to actually scrapbook some of them.
So the photos I have used are taken in a wonderful wooded hollow and I wanted to use trees to decorate the pages. I love Silver Birch trees and as they are relatively easy to draw I went for it!
Here is the layout:
I am really happy with how elegant this turned out - or is it minimal .......or is it clean?.......I confess I did have a few little smudges on my white card but I managed to cover them up by growing trees over them ;-)
Here is a close up of one of my pretty leaf charms - they are not birch leaves but they are silver!!!
And then zooming in on the leafy tops of my trees....well middle of the trees to be precise but they are at the tops of the pages!!
I set up my camera as I worked so here is a video of how I made this layout. I am pretty sure even if you don't have the Tim Holtz Autumn Gatherings Die or the same Woodware leaf punch you will have something similar on another die or punch that you could use instead. I think they could make a pretty card too...Might have to use younger trees though ha ha!
Wishing you a wonderful rest of the weekend and thank you so much for popping by X