This blog is a record of my creative journey. I love to share my passion for paper crafting so I design projects and then create tutorials and workshops to show you how to make them. Please feel free to wander around to check out all the things I share both here, in my ETSY shop and over on my You Tube channel. Thank you for popping by!
Hi everyone. I did think I might have trouble with the letter Q and this weeks alphabet tag. There are not as many words that begin with Q so I thought I might have the same problems with Zentangle Patterns ........but no there were 3 Q Patterns and I have used them all on my tag this week. QUANDARY is on the top bow, QUILTZ on the bottom and my favourite this wee (coz it was easy peasy!) was QUEEN'S CROWN which I made a frame around my tag with.
My other inspiration was of course origami paper bows! I have made tons since I learnt how to make them last weekend!!! I think I am just about bowed out for a while but they made a cute embellishment on my tag this week.
Hope everyone is having a fun weekend. For the past couple of days I have been working on a project inspired by the challenge over on the Simon Says Stamp and Show Challenge Blog. The theme this week is colour and I was worried for a while there I was going to miss the posting deadline!
Colour made me immediately think of my Distress Inks as they are my go to item when I want to add colour to a project. I can paint with them, stamp with them, make inky gorgeous backgrounds with them, dye ribbon with them and do this with them!
I had a wonderful inky time putting this together. As you can see I was quite a while making all these teen tiny paper bows. I learnt how to make them last week and now I think I am a bit bowed out!!
I loved the dimension of this piece and I think that the liberal use of cream highlights the Distress ink colour pallet. It makes a great reference point when I want to create Distress Ink colour combinations too.
If you want to try something like this I made a video of how I put it together. I like making these videos as it shows the design process and how fluid it is. You may start out with a firm idea in your head but the practicalities of creating that vision may take you in a completely different direction.
There is also a video on my You Tube Channel to show you how to make the origami paper bows. I would suggest starting with a larger bow first though!!
This project reminded me of another piece I made inspired by my treasured Distress Inks. Another celebration of the gorgeous rainbow of colour at your fingertips. This piece has hung in my open plan Kitchen Diner next to the Conservatory window and there is no hint of any fade at all......Might be a bit of dust though!
Wishing you all a colourful weekend.....I am hoping for sun to get out in the garden as it needs a bit of a tidy before nature gets to spreading its beautiful colours all around.
This seems a little strange to post in April but I noticed that I had a video waiting to be edited that I made Christmas last and rather than keep it until next year I thought I would share it now. Late for last year and early for this year!
I designed this tag for the Christmas Swap over at Tag Tuesday and I had forgotten I taped the process so I could make a tutorial. Still better late than never. I am sure that you could make the shaker portion of this tag and display it on a Christmas Card rather than a tag.
Hope you like the tutorial.
Off now to make more bows or I will not get my challenge piece finished!
Morning All. There is a queue for the shower this morning so I thought I'd nip down and post this picture of my desk.
My desk is rather Distressing today!!! ha ha. I am making a project for a challenge and am in the process of making some teeny tiny paper bows in all the colours of the Distress Ink Rainbow! It is a labour of love. I learnt how to make these bows at the weekend and they are so fab I just had to share. Last night I uploaded a video tutorial and so today I am sharing it.
Hope you all enjoy it and give it a go. Don't forget to subscribe to my You Tube channel if you want to hear when I upload my next video. It doesn't seem long ago that I shared my first ever tutorial. I am really enjoying making them even if it does take forever to upload them to You Tube!
I'd better go and chase my son out of the shower if I want to have some hot water! See you when I am decent! If you want to find out more about the greatest desk hop in the world then please follow this link and enjoy!
If you leave me a comment, and I hope you do, I would love to know where you are in the world today.
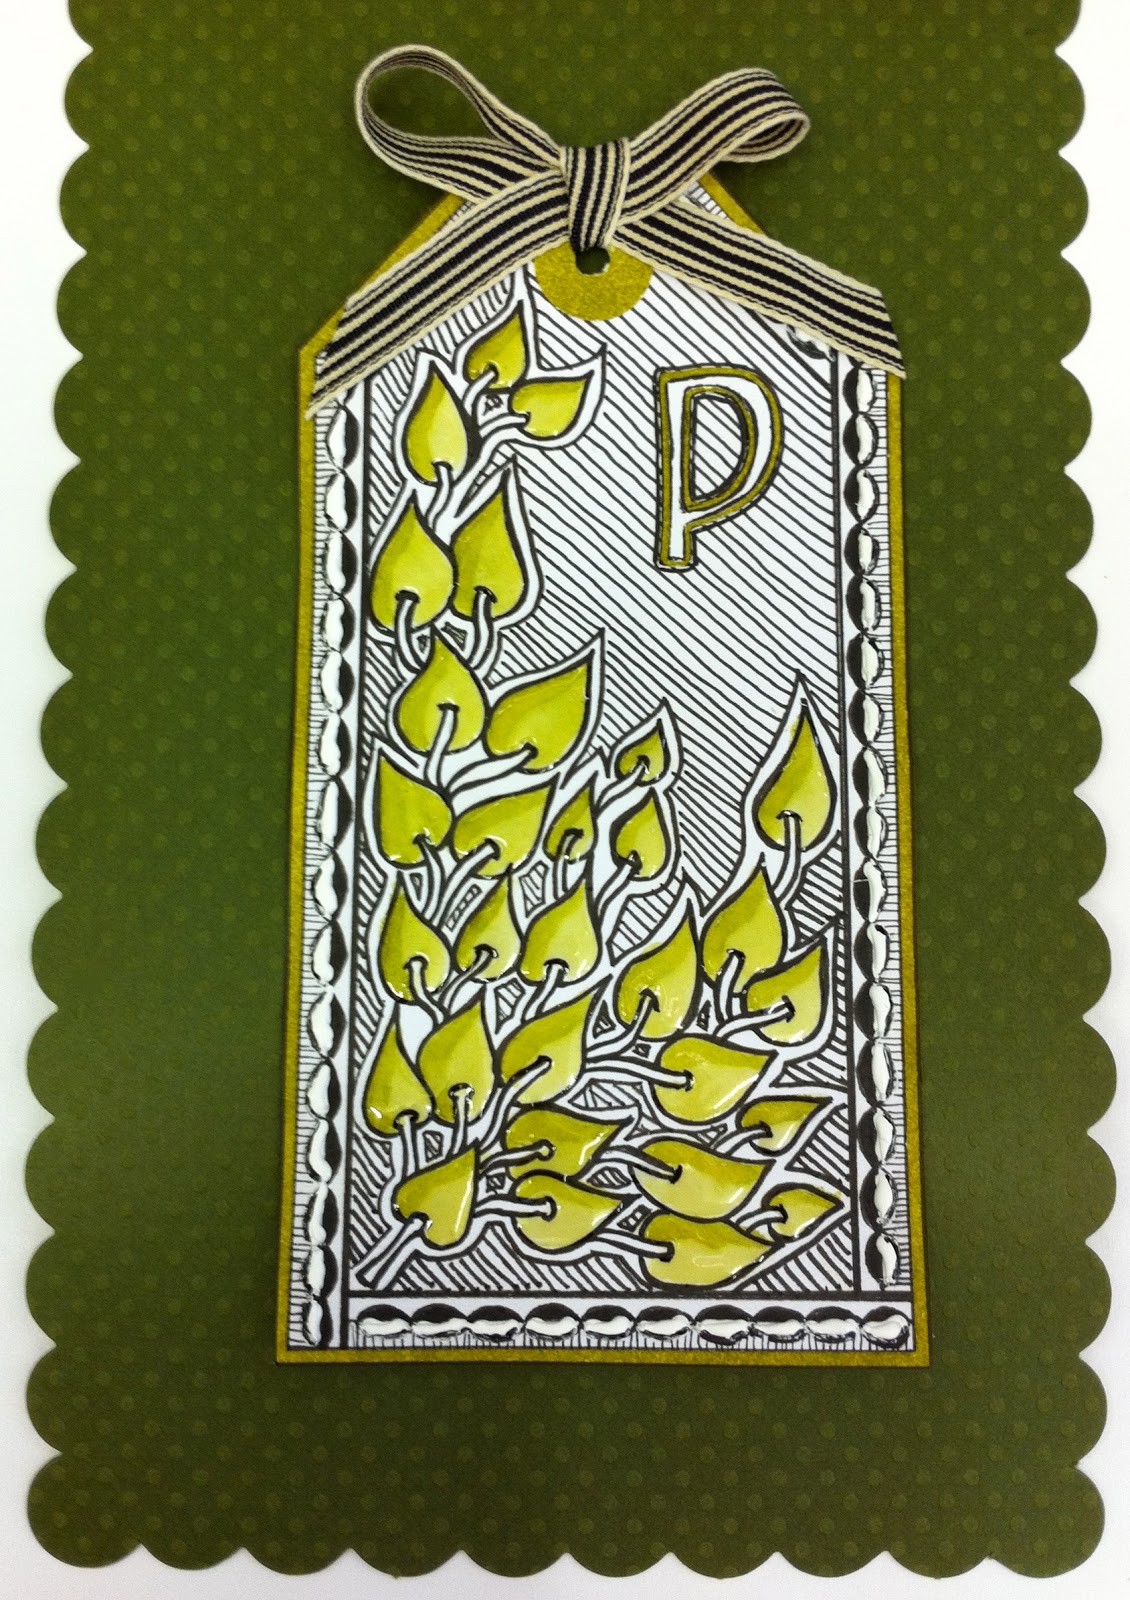
It's the letter 'P' this week so I am sure there are going to be some funny posts over at Tag Tuesday. I think the hilarity us Brits find in funny phrases that occur when talking about the letter P is typical of our humour. It reminds me of those wonderful old seaside post cards. Just a touch naughty and a lot childish fun!
Dare I say 'My P is green this week!!! ;-)'
I blame it on the Peeled Paint Distress Ink! My Zentangle patterns are: around the border PIA and in the centre POKELEAF. I kept it simple today as I liked the natural looking leafy pattern and wanted to feature it. I added colour and glossy accents to the leaves and I tried adding a little texture to the border pattern with white PVA glue. It's not as perfect as I would have liked but it did add another dimension to my tag.
I am off to work on a piece I want to enter into a challenge and to finish editing a video tutorial for a fun paper bow I learnt how to make at the weekend. I just got my 25th subscriber over on my You Tube Channel so I am all excited this morning.
Wishing you a wonderful day and thank you for popping by X
Good day to you all. I am taking a while to rev up this morning. I hope you are faring better! So what is Wednesday like in my craft room? Well there is this new addition! It is on wheels and is proving to be very useful. I have all my scraps in the files on the top all nicely colour and pattern sorted and then I have decided to use the rest of the trolly to put the tools I use most on as I seem to spend quite a bit of time transferring tools back and forth between where I craft and where I video. It is working well and I am using up and putting away my scraps more too.
Then there is my desk! Covered with......crikey what a mess! I have been playing with a set of Baby Jane papers from Cosmo Cricket and have had fun making a layout and some cards. Now I have to clear the desk so I can finish prepping for my card class on Friday.
This chair is in a reasonably tidy place in my craft room and has everything cut and sorted for the first card we are making in class. See I am a bit organised!
Here are the cards I made with my Cosmo Cricket Papers. I love the cheery patterns on this yet another grey day - who has pinched the sun???? Let me know if you have it ;-)
I had fun making the spinner which I haven't tried before. So much fun I made another one!!
I made an embossed grid on the front of this card which made it easy to create a neat patchwork border. I think you can just about see the grid on the photo. It has a pop up heart in the middle.
I think all these designs would be a great way to use up mix and match scraps of paper too. Where is that trolley of mine!
Now the question is To Tidy or to Desk Hop..........Desk Hop it is then!!!! Follow me to try desk Hopping for yourself.......especially if you too want to put off the tidying ;-)
The Daisy Projects is the latest (third) item to arrive on my virtual shelves! Learn how to make a fabulous Daisy Embellishment (Video Tutorial 1), Gift Box (Video Tutorial 2) and Matching card (Video Tutorial 3) and if that wasn't enough the photo instructions that come with the tutorials show you how to change the Daisy into a Gerbera! All this for the bargain price of £3.50. You do need to have or have access to being able to use the Tim Holtz Tattered Florals and Tattered Leaves die to make this Daisy.
I hope you like the projects enough to buy my tutorials and join me in my virtual classroom. The beauty of my lessons are you can take them any time, in any country and you can pause me anytime you like to take a coffee and cake break! Oh and I will not mind one bit if you make me repeat myself over and over again! ;-)
I am trying to get PayPal buttons to work on my blog but they are still on trial at the moment. I hope to be able to try them at the weekend on a different computer to make sure they work so in the meantime if you want to buy this tutorial click on this link to my ETSY shop!
I had a bit of a scare today as when I clicked on the Zentangle Pattern site I have been using to make my tags there were no O patterns. Oh no I started to panic and then they appeared - just a slow page load ;-) I thought for a minute I might have to make my own pattern up.......Thinking about it I might just have to do that before my Tag Zentangle Pattern Alphabet is finished.
The sun is shining today though the wind is blowing too so it looks warmer than it is. I like days like this to sit in the conservatory as it magnifies the warmth of the sun but no cold wind!!! Makes you nod off if you are not careful though ;-)
Can you see my tag! This is a bit of a camouflage shot but I thought it was fun. Today I got to the green part of my Distress Ink Rainbow and so I decide to incorporate leaves in this tag design. The background tag has the OOF pattern and it lives up to its name as that it what my eyes would have said when I got to the end of the patterning!!!
The leaves show the four stages of the OSKIE pattern and 4 shades of Shabby Shutters (much nicer than grey!)
Hope you have all had a fab weekend. It is back to the normal school day routine for us tomorrow now the Easter break is over. I am planning on putting my earlier mornings to good use and get my self exercising again.....I'll let you know if I manage it ;-)
I made a video tutorial to share today. I originally came up with this method of using Card Candi when my Hubby decided he didn't want a card with 50 on it! I used different shades of gold Card Candi and so the 50 was still there but subtle!!!!!
It is an easy technique but it requires neatness and accuracy to look it's best.
Here is a close up of all those pretty Card Candi dots. It really reminds me of many happy hours I spent as a child making patterns with coloured pegs in a white peg board. Do you remember those? Almost as good as an Etch a Sketch!
Here's the video link. I just know you could make all sorts of designs using this technique. What about a heart for Valentines day or a Rainbow or a smiley face........I think I might try that one!
Running a bit late again this week. I am blaming it on the Easter holidays!!!! It looks like Spring is finally threatening to arrive in my neck of the woods. The weatherman is forecasting the weekend for a significant rise in temperatures and cold, rain and snow before then!!!! Talk about hedging your bets. I have another yellow tag this week before I move on to the green family of distress inks. It is definitely a cold acid yellow which is my least favourite shade of yellow which is odd as I do usually tend to favour the colder tones of most other colours.
My Zentangle patterns this week are on the left of the main tag a pretty one called NETTING on the right one that takes ages NINJA STARS! The little tag on the bottom is NIPA and the top little tag turned out to be my favourite pattern this week NZEPPEL. I think it has made the tag look a little bit bowed. What do you think? It definitely looks more complicated than it was to draw. If you are keeping up with all the tag art being shared at Tag Tuesday then click on the link!
I am off to learn how to add a Pay Pal button to my blog. If I master it I will be able to sell my patterns and video tutorials direct from my Blog - that would be cool.
Hope you are having a great week. I am hoping to announce a giveaway next week so keep popping by!
I am sad to say I didn't make it through to the second round of the Graphic 45 Audition. But I just wanted to let you know how much I appreciated your kind comments and good wishes.
Congratulations to everyone that got through and good luck for the final part of the audition. I can't be too sad as I had a lovely time making all my projects and it has made me more determined than ever to make my dreams of having a successful crafting business a reality.
Who knows I might just give that tag a try again next year!
I can't believe it is the letter M already. Half way through the alphabet and 13 weeks into the year - time flies when you are having crafting fun.
The Zentangle patterns I tried my hand at this week were on the strips MEER and on the flowers MUMSY. As I ended up with a lot of white space on my tag I decided to add a bit more of the lovely Scattered Straw Distress Ink and used my water brush to fade it out into the centres of the shapes and also added a touch of colour on the petals of the white flowers. I coloured my ribbon to match my tag as I did not have a ribbon in this lovely creamy shade of yellow.
If you want to see more tags then please follow this link to Tag Tuesday. Why not play along.
I am keeping everything crossed as I write this post (that is quite a feat I can tell you ;-)). I am excited and nervous and definitely a little bit shaking in my shoes but here goes.........
This is my Graphic 45 Design Team 2013 Audition Blog Post!!!!
This is my longest post ever so you may want to get a cup of coffee and a cookie or two! I will do my best to keep you entertained with all the projects I have been designing and making for my audition. It was definitely hard work but a labour of love so I am not complaining one bit. Project 1 - The Surprise Package Graphic 45 Style!
I am starting off my audition by showing a project I designed quite a while ago now and I never tire of making it. I already had this example completed in Graphic 45's Little Darling Papers as I wanted to make a New Baby version that included a surprise pop out baby alphabet block. I used the green and peachy pink papers in the collection and they make a lovely fresh combination that works well with the cream base card stock.
Keeping it simple with the embellishing I found some pretty flowers and buttons in just the right shades of peachy pink and green. I distressed the edges of all my Graphic 45 papers as I wanted to add just a touch of shabby.
I really love the Peek a Boo paper that I have used here on the inside of the envelope. Wouldn't it make the most perfect nursery paper? One of the many things I love about designing and making projects with Graphic 45 papers is that when you look beyond the obvious uses for a particular collection there is always so much more than first meets the eye. The photos above and below show what I mean perfectly. Peek a Boo above is definitely a baby project paper but look at the delicate patterns below and you could make something pretty for your Mum on Mother's day or a cute Easter Card and soooo much more.....
I just couldn't resist making another version of the Surprise Package project especially for this audition (any excuse to play!) so I rummaged through my papers ;-) and made this yummy Bird Song Version. The Cherry Blossom paper was my collection favourite and was it perfect to use as I could show off both sides and I love the delicate peachy tones which I used on the outside of the envelope and then that beautiful shot of turquoise when you open up the envelope to reveal the surprise within. This is how the project is designed to be displayed once it has been opened.
I had the perfect die (recent treat to myself!) to compliment this gorgeous Graphic 45 Cherry Blossom paper!! I really loved decorating the little pop out cube with branches of blossom.
I added micro beads to the centres of the cherry blossoms with a dot of glossy accents and I printed all the wording on my computer - I really hope they are correctly translated!!!
I used a few of the Bird Song Stickers for this project. The pretty bird stamp makes a fab pocket on the inside of my envelope that is just perfect to pop in an extra surprise for some lucky birthday person! I cut lots of strips of butterflies from the Endless Spring paper to use on the edges of my envelope and as pretty trim. They were the perfect fit as you can see.
Another pretty sticker made a seal for the closure of the envelope and a border strip sticker added a pop of colour to embellish the outside of the envelope.
Photographs can't really do the surprise element of my project justice so I have included this video to show you just what the 'Surprise' actually is!!!!
Project 2 - Scrapbook Layout
I often wonder if I have a particular style that is recognisable as mine and I don't think I have. I do know that when it comes to scrapbooking I have a hard time putting things on the page that are not straight. I almost have to force myself! My friends chuckle as elements I place down on the page at an angle gradually straighten themselves as I put the design together ;-)
This layout illustrates exactly what I mean. Not an angle in sight!!!.........
..........Oh, except perhaps the one the camera appears to have taken on in this photo! Something else which makes Graphic 45 paper a favourite is that one collection easily mixes with another. For this layout I have used a relatively new paper Old Curiosity Shop - Exquisite Motif and mixed it with an older collection Transatlantique - Travelogue paper, a dash of golden yellow and voila! Gorgeous (if I do say so myself ;-) May I draw your attention to the pleated frame that took forever!!!!!
I love to scrapbook and always try to journal as much as I can about the photos on my page. I am always writing to my sons when I journal and I often hide the journalling as I have here on this large but surprisingly discrete tag. I really enjoyed making the flower embellishment that also acts as a pull for the journaling tag. It is amazing how the flat brass Graphic 45 flowers come to life with a few tweaks of the piers.
Is that an angled ribbon I see????
I love making videos, though I have learnt they are very, very time consuming to produce! I thought you might like to see the design process I went through to make this layout. I always aim to produce as professional a video as I can particularly when making a tutorial but now and again I like making fast forward videos as they are 'slightly' quicker to edit but I still think they are a great way to share inspiration and ideas. I once made a video of a tag I made that had a xylophone on it and I decided to play it with full audience sound effects at the end of the video. I was laughing so much at my idea that my husband came in to see what was going on! It thrilled me that when after I had shared the video on my You Tube Channel I received a lovely comment from a viewer that had chuckled along too......result! This video is a bit longer than the previous one so only watch it if you have time to spare. Go on have another cup of coffee and a cookie!
Project 3 - Family Recipe Memory Box
I altered a Graphic 45 Matchbook box (a bit of a tongue twister to say out loud!) for my third project and it features the lovely ......and brand new to my stash.......French Country collection of papers.
This project started out life in my head as a memory box and mini that was somewhere you could put those items we treasure that don't fit in a scrapbook and that have a story we want to preserve. Whilst I was working on it my friend Deb commented that it would make a lovely recipe book and I combined the two! It is perfect for our family as we have so many memories attached to great food that we have shared with family and friends over the years.
Lots of fussy cutting to make these pretty sunflowers. A bit more below to complete the Rooster. I added the chicken wire to the aperture to capture the look of those lovely old kitchen dressers you see in country kitchens.
The A La Cart paper was perfect to use for my recipe cards. Each of my pages have a pocket at the bottom so I can tuck in photos and my pretty recipe cards. I have dedicated this page to our friends Andreas and Eleni who always treated us like family and taught us all we know about dining in Cypriot style.
I know I am going to enjoy recording more memories of friends, family and the happy times we shared eating the most delicious meals!
Tucked away underneath the mini album is a secret compartment to store all those items that defiantly won't stick on to a scrapbook page but we want to treasure them just the same. My friend Deb lent me some precious items that her Grandmother gave her especially for my photo. There is even a cute rooster cookie cutter - perfect! I am going to store some of the herbs and spices that are in the recipes I am journalling about.
I made a little video tour to tell you a bit more about my Memory Box project.
Project 4 - Graphic 45 Clock
This clock sits on my dresser. It is made from chipboard and an old tin that used to hold paper flowers! I have mixed and matched from my Graphic 45 paper stash and I think the papers tones bring a vintage elegance to my piece. I originally made this in March last year for a D's Paper Studio Challenge that was sponsored by Graphic 45 (I do love a good challenge!)
I have two drawers in the base that I have earmarked for some family tree tags (one day!). I think you can see the fun I had adding tiny jewels to the patterns on the papers. Fiddly but worth the effort.
I needed to be able to remove the clock to change the batteries so I also have a secret compartment!.....or the perfect place for a mini album!
Project 5 - The Pyramid Mini
For my fifth audition piece I wanted to show you this Pyramid Mini that I designed for my youngest son's 14th Birthday. I wanted to make something he could keep so this seemed to be perfect to give in celebration of his special day. I just had to use some of my Graphic 45 papers and these seemed perfect for a teenage boy.
The little drawer in the base of the Pyramid is a cute mini album - I haven't managed to put photos in it yet!!! I loved using the pattern of the harlequin paper to add interest to the spine of the mini.
I was originally thinking an exploding box would be a great way to make a keepsake card but as you can see as I designed it it became so much more. I am in my element when I am constructing with paper!
The pyramids explode open to reveal a birthday celebration centre piece! I find that when I am designing a project like this that now and then something happens by accident that turns out to be so fab that I wish I could lay claim to having come up with it on purpose ;-) Those bottle top embellishments are what keep the centre pyramid from opening all the way out and doesn't it look like that is what I intended all along!!!?
I had such fab feedback from my Pyramid Mini design that I taught it in a workshop recently so there are now 8 other pyramid minis out there plus this next one! I made this pretty version from the beautifully feminine Ladies Diary papers. This one is all mine!!!!
It was a real treat to do something so totally girly! The new Graphic 45 Ornate Metal Label holders make fab drawer (mini album) pulls.
I kept the decoration a little more minimal for this piece as I wanted to see the gorgeous Ladies Diary papers!
The centre pyramid pops open to reveal a pretty layered flower nestling in more pretty lace.
I don't know what I am going to put in the mini at the moment but I think it should be something romantic and dreamy just like these papers.
...And Last But Not Least!
Project 6 - Lucky Tag?
I couldn't finish my audition post without making a tag! Anyone that knows me knows I love taking time out to make a tag or two......or three. Last year I made so many I decided to put them on my wall for inspiration! I find they are the perfect way to try out ideas and to try something new and of course to use up all the tiny pieces of paper I squirrel away! I had plenty of Graphic 45 snippets to rummage through but I decided I really should use some more of the paper that began my passion for Graphic 45 designs the very first piece of paper I ever bought from a Graphic 45 collection. Here it is before I started on my tag. As you can see I have only used a small piece so far and carry it with me always!! One thing that puzzles me though is how it got the name Bees Knees?
I started out with some Graphic 45 packaging and decided to try to make myself a lucky tag!!
I have used a bit more of my precious cherry paper which I have christened 'my Lucky Paper'. I made a Wheel of Fortune to spin.....I did think about loading the spinner in my favour but I couldn't make the numbers work!
So with my odds being even I gave myself a whole shaker full of stars to wish upon and then just in case........
.......... I delicately cut out a four leafed clover and captured it in a locket.
And here is, what I hope will prove to be, my lucky tag!
This was without doubt the most preparation I have ever done for an audition/interview and I have enjoyed every single moment. Thank you for this wonderful opportunity and I really hope I have managed today to show you the passion I have for designing, teaching and paper crafting. I have done all I can do to make my dream of being picked for the Graphic 45 Design Team come true and all I can do now is hold on to my lucky tag, make a wish and press the button to post.